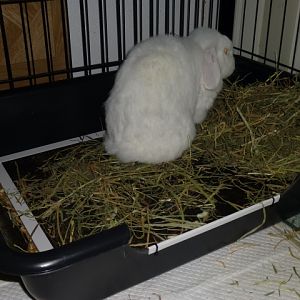
It's the type of mesh you use that's different. It's a plastic mesh instead of the usual fiberglass, and it's designed to resist damage from pets clawing at it. The edging that I used is a plastic/vinyl edging, normally used for the edges of wall paneling here in the US. I'm not sure if you would have the same thing there.
If you're interested in trying it here's the tutorial on how I made it, or you could just try the screen itself without the edging, but the edging does give it structure so it can't be moved around or edges chewed on by buns. Let me know if the photos don't show up.
(Copied from another thread)
You will need a roll or piece of the correct size needed, of the pet mesh/screen. It's not normal fiberglass window screen, but is a thicker plastic screening made to resist pet damage. I got mine at walmart, amazon has it, as will home improvement stores.
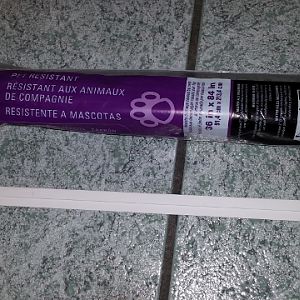
This is the white plastic edging, which I got at Lowe's home improvement. I used the smallest width, which is what you want. There are a few different colors: white, beige, and possibly gray and black if you can find them in the smaller size.
http://www.lowes.com/pd/Sequentia-0...ainscot-Panel-Cap-Wall-Panel-Moulding/4768311
You will need heavy duty scissors to cut the plastic edging, or I used tin snips. If you use the zip ties to attach the edging, you will need something to punch holes in the edging to run the zip ties through. I used a leather punch.
First is taking measurements for the screen size you will need. Make sure to take measurements with the litter in the litter box as this can sometimes affect the size of the screen that you will need. I try and get the screen as close to the edges of the litter box as possible. Too small and it will shift around, too big and it won't fit right.
Once you have the measurements, unroll the screening and mark your measurements out, I used a silver permanent marker so it would show up on the black screening. Cut out your piece of screen. Lay it in the litter box on top of the litter to make sure you got the measurements right.
Next double check your screen measurements by remeasuring it, then use those measurements for your edging pieces. Measure and mark the edging, then make a 90 degree cut. Put each piece along the edge of the screen to make sure your measurements were correct, then with all edges in place, lay the screen into the litter box to make sure the fit is right. You want to make sure it fits before you attach the edges permanently.
Next is assembly. There are two ways I've used. First is the easiest by using zip ties to attach the edging to the screen. You want the smallest 4 inch ties so they fit easily in the holes in the screen. The down fall of this method is that hay and urine collects in the edging channel and you need to use a jet of water to get it out. This lead me to the second method of using 100% silicone caulk to attach the edging to the screen. I got mine at walmart, and make sure you don't get the mildew resistant kind. You want the 100% silicone caulk. I like this method the best as it seals up that channel in the edging so no urine or debris can collect in it, but the downfall is it is somewhat difficult to do and can be messy.
Here is a picture of heavy duty scissors, tin snips, leather punch, and cut edging pieces for both a caulked screen(with the lower lip of the edging cut off so urine doesn't collect on it) and a zip tied screen. You can see how the two zip tied edging pieces assemble at the corner so that the holes on each piece line up to put a zip tie through.
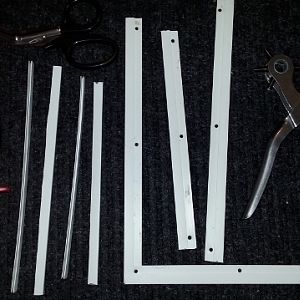
First the zip tie method. I measured and marked where I wanted the holes, then punched holes with the leather punch. Punch the holes for the corner with the two pieces put together so that the holes will line up for putting the zip tie through. Next slide the screen into the channel in the plastic edging. Make sure the screen goes all the way into the back of the channel. Then pass the zip tie through the hole and the screen and secure the zip tie, with the attachment part of the zip tie on the bottom of the screen. Then cut the excess tail of the zip tie off. An alternative to punching holes if you don't have a tool to do it, is to trim the bottom lip of the edging off so that the bottom and top are even, then you wouldn't need to punch holes in it.
Finished zip tied screen.
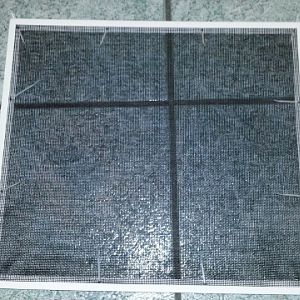
With the caulk method, I first trimmed off the bottom lip of the edging so that both the bottom and top were even. Next lay out some newspaper as a work surface and set your screen piece and edging pieces on it. Have several sheets of paper towels handy for cleaning up excess caulk. If using a new tube of caulk, make sure to cut the end off at a 45 degree angle and make the cut as close to the tip as possible so that the opening is as small as possible. I used a thick piece of wire to pierce the seal on the inside of the caulk(pierce it several times), or buy a tube of caulk that doesn't require a caulk gun to dispense the caulk.
Place the tip of the caulk into the edging gap. I pushed it in so that the edging spread apart some, to make sure all of the caulk went in there. Then slowly draw the caulk gun down the length of the piece as you squeeze the caulk in.
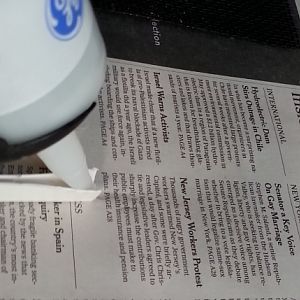

Once there is caulk all along the gap of the edging piece, wipe off any excess with your finger, then slip the edging piece onto the correct side of the screen, very carefully so you don't mess up the caulk too much and make sure the screen sets all the way to the back of the edging channel. Then carefully slip zip ties through the screen an inch or so from the ends(and a zip tie or two in the middle if a large screen) to help secure the edging while it dries. I like to do the long side edging first, then the top and bottom.
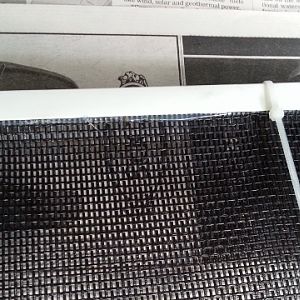
Carefully wipe away any caulk that may have squeezed out of the gap when the edging was attached to the screen. Do the same for the rest of the edges. When done carefully check over the screen for any caulk messes to wipe off. Be careful not to let the screen flex too much as the caulk is still wet. Then lay your screen on a clean piece of newspaper to dry in a well ventilated area. I left it for a week to make sure it was completely dried and cured. Once the caulk is completely dried you can cut the zip ties off and remove them from the screen.
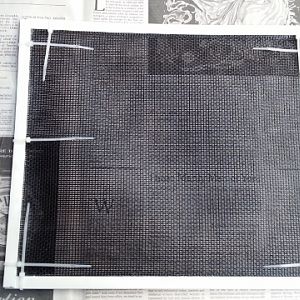
Finished caulked screen.
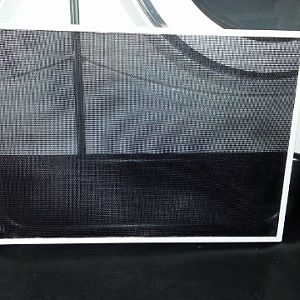
If trying to decide which attachment method to use, the caulk method is the best one as it keeps the screen the cleanest with no gaps for debris and urine to build up in, and so is the easiest when having to wash the screen. But it is a bit tricky getting that caulk into the gap when assembling, without making a huge mess. So if you aren't used to doing caulk jobs. I would suggest not attempting it without a little practice, and being prepared for a bit of a mess with the caulk. I've done a fair bit of caulking jobs, and I found this can be a bit frustrating when that caulk tip keeps slipping out of the gap as you are caulking it.
If you have enough edging, you could start with a screen that is zip tied, then if you think you would like the caulked screen you could give it a try. This way you would also have an extra screen for when you take the other one out for cleaning.
Good luck and if anything isn't clear just let me know and I'll try and clarify.
