SOOOSKA
Well-Known Member
Junkie2 did you make one of these litter boxes?

LOL
I do sell them...but they are so bulky the shipping is killer!
I sent one to Mrs. PBJ in Galveston...shipping was $25...I guess it depends how badly you really want one! LOL
They really aren't HARD to make...but definately time consuming...and hard on the hands!:shock:
Danielle


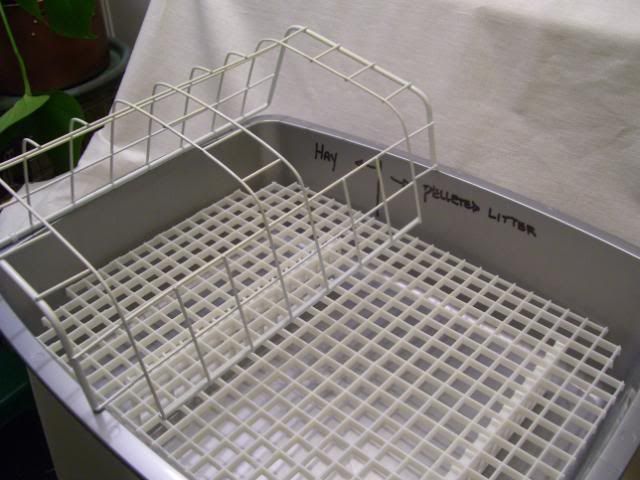
This is very cool, two of my rabbits love digging I made a screen but it is not perfect I will need a higher box as they both manage to pee behind of it, I just placed some pellets behind the box at the moment it works so they litter box is all dry just urine goes between the box and cage bars.Step by step instructions to constructing a Stormhaven Litterbox!
Beginning with the Hay Bin!
1. Choose your NIC
2. Do NOT try to bend across the weld joint...the NIC will snap everytime! If this happens it cannot be used without running the risk of your bunn injuring itself!
Locate the weld joint and be sure it is either at the top or bottom of the hay bin...NOT on the sides!
3. You should be bending the NIC on the 3rd row of squares from the bottom and again on the 3rd row from the top to form the "U" shape.
Use a marker a make a tick on each edge where you are bending.
4. Since I bend quite a few at a time I made a bending jig out of old 6x6 lumber...the easiest way to bend them is to find someway to secure them and apply body weight to arc them over to the angle you want.
In this case I insert it up to the ticks I made in the jig.
5. Using force and body weight I lean on the NIC and begin to gradually bend the NIC.
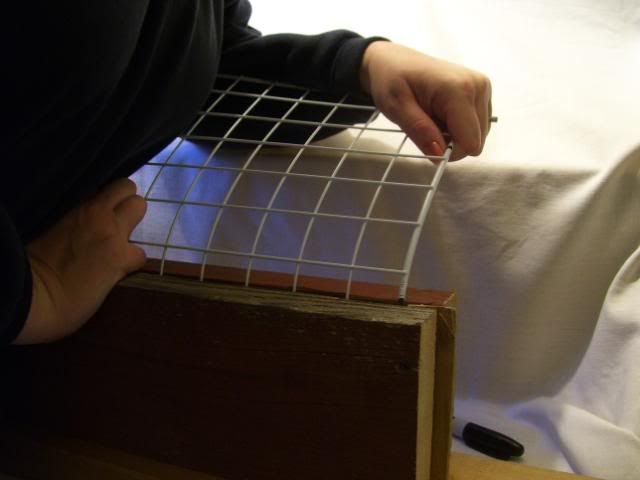
6. Bend the NIC to just shy of a 90 degree angle.
7. Once the first bend is made reverse the NIC and begin the second bend.
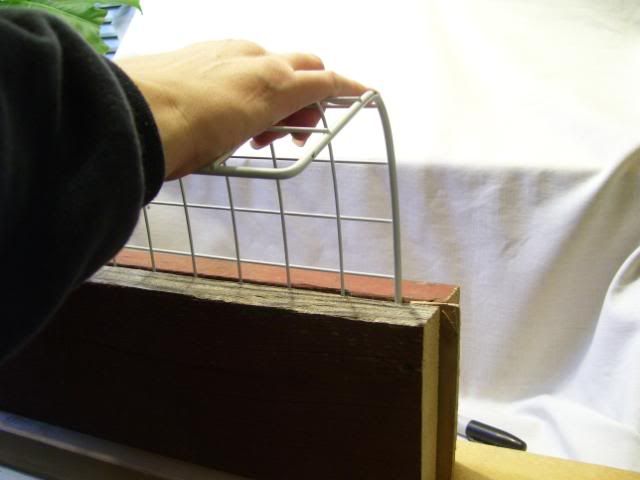
8. It should look like this when it is finished being bent.
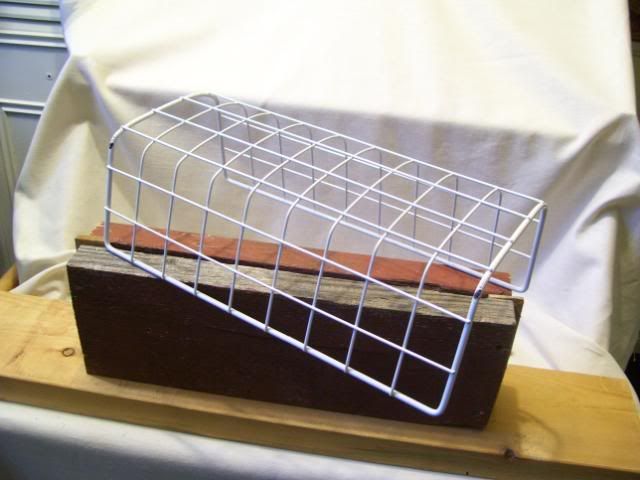
9. Mark out the opening for the hay bin. It can be one large opening but I suggest leaving one row of squares in the middle and one row on either end to keep bunny from deciding the hay bin is a nice place to sleep!
10. Next step is to cut out the wires to form the opening...I suggest getting someone with a Dremel to help you...they CAN be cut by hand...but I seriously advise against it unless you have ALOT of time on your hands!
I use a fiberglass reinforced cutting disc to cut the wires and a grinding stone to polish the cuts! It is VERY important to make sure there are no metal burrs or weld flash left when you are done...they can be very sharp and bunn may be injured! So be sure to check thoroughly before moving to the next step!
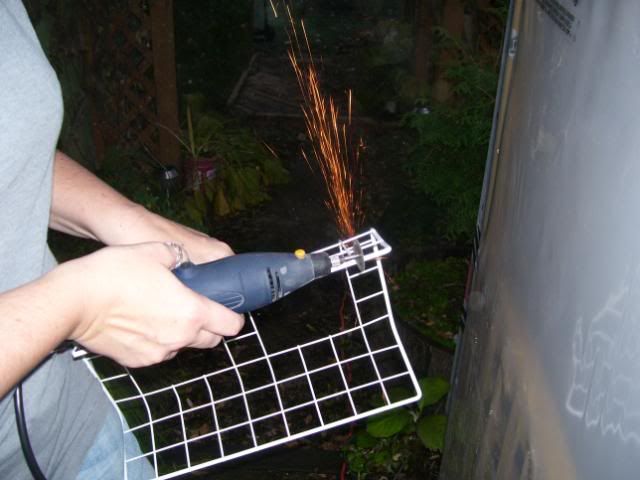
11. Once you are sure the hay bin is smooth and clean...apply a light coat of acrylic paint to any cut or damaged areas...this will keep it from rusting over time. (I know the thought of paint may make a few people nervous...but I used to make these where I worked and when we had blemishes from the oven we used acrylic paint to cover any undesirable marks...and the coating is basically an acrylic coating...it will be fine!)
The finished Hay Bin!
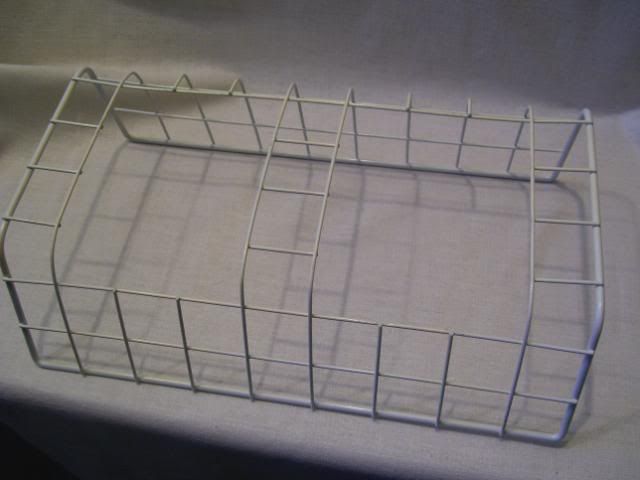
Making The Litterbox!
1. Pick a litterbox the size you want. (If you want to make life easier and want to attach a hay bin without too much cutting buy a litterbox that fits the full size NIC or you will need to notch the front corners of the NIC when you make the cutout!)
Here you can see the notches I was refering too for the smaller litterboxes!
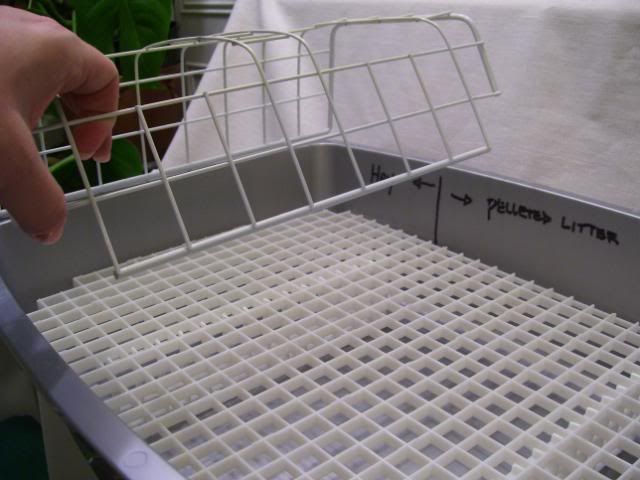
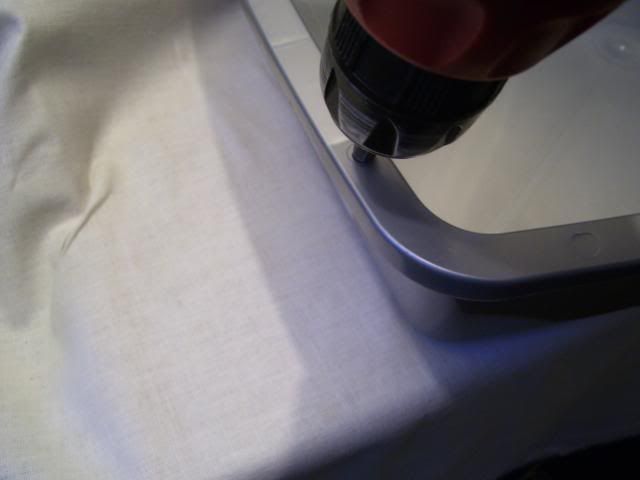
2. For those of you who are attaching a hay bin you will need to drill two holes in the top rim of the litterbox where the hay bin will be attached...like so...
3. Next we need to cut the light grating to fit the litterbox. It comes in a 2 foot x 4 foot sheet. Wire clippers work best for this part. You will need to clip a section of grating that fits as closely to the sides of the litterbox as possible...it should be sitting at least 1 to 1 and a half inches above the bottom of the litterbox! This will allow the pine pelleted litter to swell without touching the hay or bunnys feet!
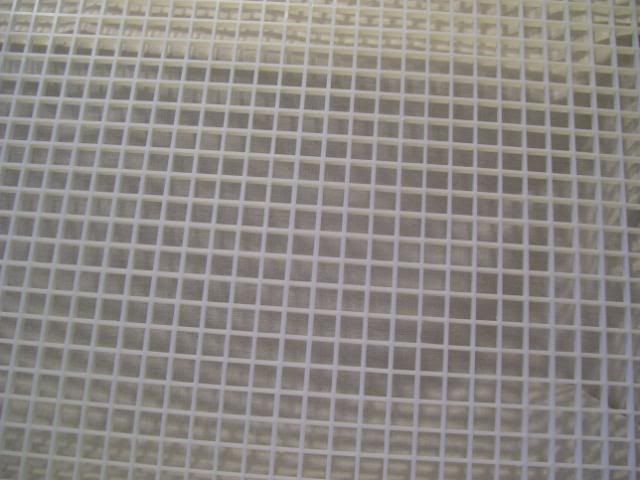
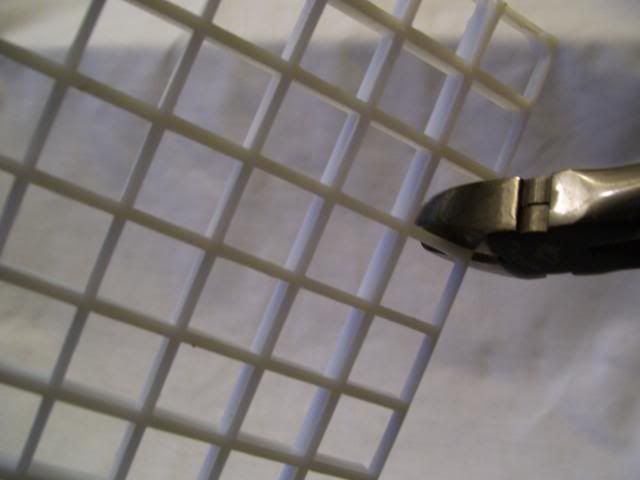
4. Once you are happy with the grating it needs to have feet added for support! Grating can break and bend so adding feet helps support bunnies weight better across the surface!
When I cut feet I used to just use little ones but we found that 2 sets of long feet that run the width of the litter grate were best...when you cut out the feet you will need to leave nubbies on the top part that you will glue to the bottom of the litter grating. These will provide extra strength to the feet to keep them from popping off!
We usually leave a row of half cut squares which we then slide into the litter grating and then glue in place. You should be able to see what I mean in the pic.
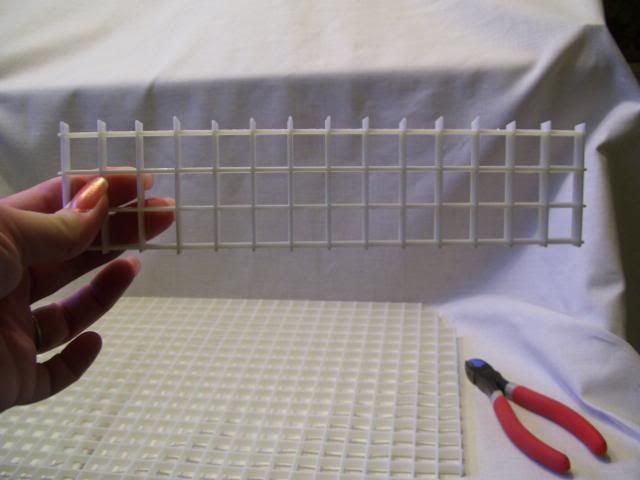
5. Before you begin gluing...take a good look at the light grating...one side is bevelled(rounded) and the other is square cut...you want the square cut side facing down into the bottom of the box! It is sharper and you DON'T want bunny walking on this side!! Use a good quality crazy glue to glue the feet to the litter grating. DO NOT use the gel kind...it takes too long to set and in our case has shown to fall apart more easily than the regular crazy glue!
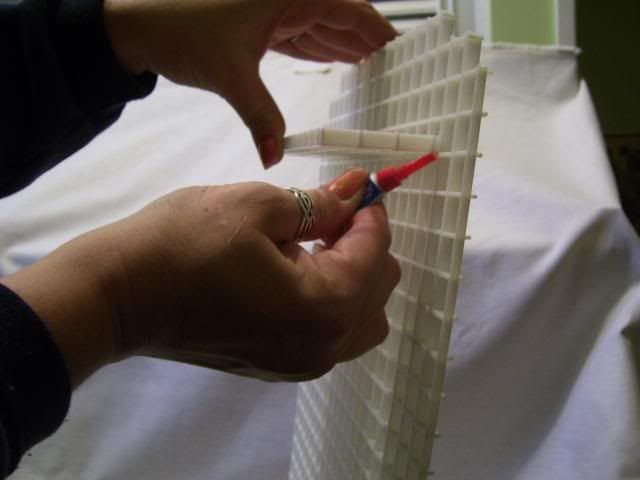
Close up...
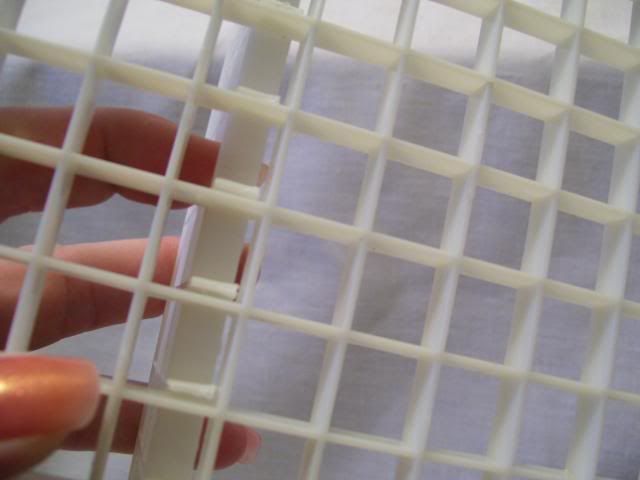
6. Once the glue for the feet has dried your litterbox should look like this:
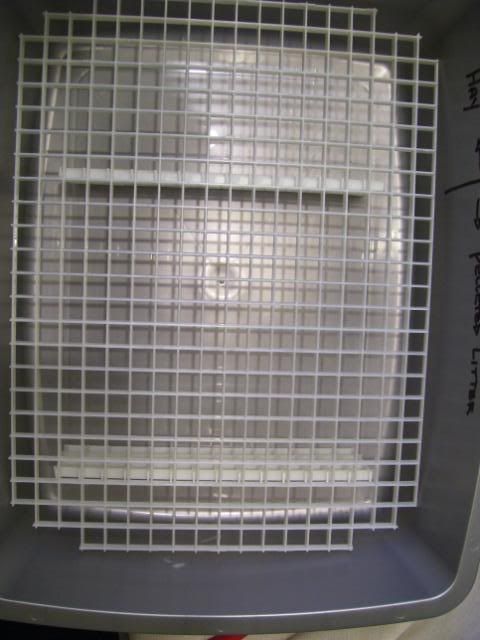
7. This is generally how we divide our litterboxes...there is no need for litter under the hay bin...put a SINGLE layer of pelleted litter from the bottom of the box to the second set of feet leaving the top of the box bare for the hay!To use more than a single layer is wasting the litter and may cause it to swell up above the litter grating!
8. Now to attach your Hay Bin to the completed litterbox!
Take two zipties...feed them through the holes you drilled in the litterbox rim...
Loop them AROUND the bottom wire of the hay bin where it rests on the litterbox...
Bring them back towards you...
Then feed them BACK THROUGH the same holes!
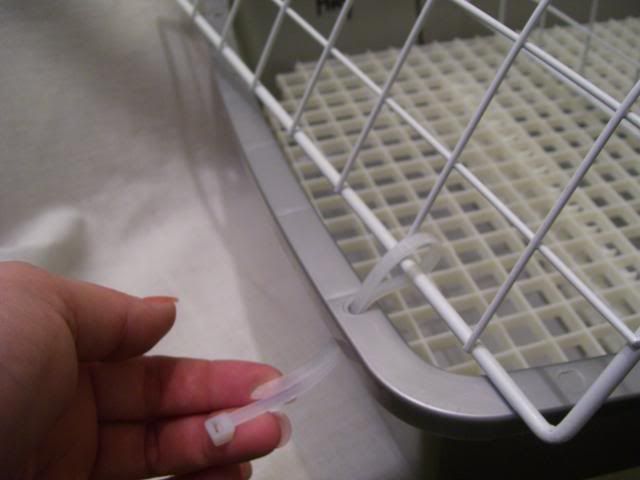
Clip off the excess from the zipties!
9. You should now be able to ziptie the hay bin to the litterbox forming a joint that will allow the hay bin to pivot for easy access!
10. Finally you should have completed your first Stormhaven Litterbox with attached hay bin! If you did it right it should resemble this one!
