2013 Cages You've Made

Rabbits Online Forum

Help Support Rabbits Online Forum:

This site may earn a commission from merchant affiliate links, including eBay, Amazon, and others.
Status
Not open for further replies.
I'd post, but I posted in the 2012 thread and haven't made a cage this year... unless you wanna count the glider cage I'm making :p

I'd say re-post your cage here. That will make it easier for people to see what we all currently use. (Easier than newbies trying to find old threads).

Here's my current cage (also from last year) which is more of a home base since it's open all day long.

2 outside cage - Copy.jpg
 
Also here is Rocky's cage, It was a dog kennel I bought on ebay I just added a door and meshed in the window. Both Gidget and Rocky's cages are a work in progress, When I get them 100% how I want them I will post more pics! I am happy to take any suggestions and ideas, if you have any pls pm me :)

2013-04-08 11.00.22.jpg

2013-04-08 11.01.07.jpg

2013-04-08 11.01.39.jpg

2013-04-08 10.58.04.jpg
 
I'd say re-post your cage here. That will make it easier for people to see what we all currently use. (Easier than newbies trying to find old threads).

that reeks of effort, lol. I'll do it some other time... in the meantime, if anyone really wants to see, the bunny page of my website is the link in the final line of my signature - scroll down to the very bottom and there's pics of my condo and bunny pen :p
 
This here is my rabbit cage! :) 5X2 organization cube squares? haha.. I BELIEVE it's big enough, but sometimes I feel like I should have more in there, or some help in ideas. But this is buns cage! Anytime I'm home she's out and about in my room roaming; and for the 6 hours I'm at school she's in here :).

DSCN7422.jpg

DSCN7415.jpg
 
here's my bunnies enclosures. x-large dog crate with a shelf. dustbunny was moved into a med. dog crate until their rebonded again. going to put on a second level once they're together again.

2013 006.jpg

2013 003.jpg

2013 031.jpg
 
The condo is approximately 5 feet long, 5 tall and 2.5 feet deep. It has 3 main levels and a small penthouse. We made a plywood base on wheels for transport and to be able to clean behind the condo more easily. The metal grids are 14" by 14" and are secured with about 500 zip ties. The levels are braced by 3/4" dowels. The bottom floor is rough linoleum and the upper 3 levels are low pile carpet. We placed a piece of plywood on top for my plants. The bottom level doors swing inward and are independant of the second/third story door. the penthouse also has an access point for cleaning. This was a weekend project.

Sophie also has access to the living room most of the day and night as I work from home.

image.jpg
 
Last edited by a moderator:
Here's the rabbitat I just finished for Charlotte and Hank. Its very similar to Sophie's Humble Servant's above...I copied a design I came across on Binky Bunny with some of my own modifications. It is 56" wide by 28" deep by 28" tall.

It has a 1/2" plywood base that I put on rolling casters for easy movement for either cleaning or relocating in the room. The 1" material that bands the rolling base also does a great job of stabilizing the NIC structure.

I covered the plywood with 18" self-sticking vinyl tile from Lowes. The interior litter pan fit perfectly in the corner on the left. I had to adjust the platforms lower as my bunnies aren't big jumpers. I need to get a larger piece of carpet for the large platform, but wanted to get something on it temporarily for traction...otherwise its too slippery to jump onto and off of.

The front door folds down and is laid on the top when open. When its down, I can secure it with two dog leash clips. The same goes for the access lid to the top level on the left.

One feature I really like is I zip tied the 1x2 material to the interior of the NICs to make the supports for the platforms. I can remove all the platforms just by lifting them out in less than a minute, so cleaning should be a breeze.

Materials wise, it took 34 NICs, eight vinyl tiles, four casters, a zillion zip ties, one sheet of plywood, some 1x4 and 1x2 material, three dog leash clips and a full day of my time. Now that I know what I'm doing, I could probably do it again in four hours.

Hope you like it!

IMG_1715.jpg

IMG_1716.jpg

IMG_1717.jpg

IMG_1718.jpg

IMG_1719.jpg
 
I notice some of the bunny's pens are on carpet. Does your bun eat the carpet? Mine seems to love to nibble carpet and rugs, baseboards, etc. lol
 
Hope it's okay to bump this thread!

tumblr_mnbe4c3q9T1sp2ui2o1_500.jpg


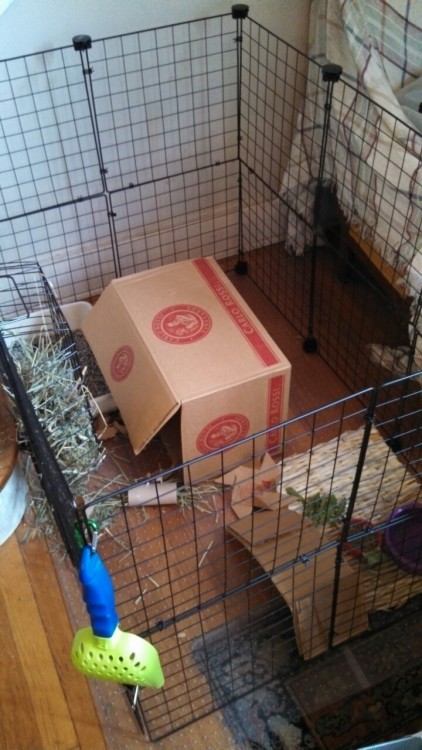
(Ellis is present, but napping in the box - it's his first day here, so he's a little shy.)

We found knockoff NIC cubes (branded Design-A-Cubes) to build our first bunny cage. Dimensions are about 28x28x42". He's a very small Silver Marten, but we plan to expand the cage a little further once he's settled into the house. Also attached a matching wire letter tray found among the office supplies, that makes a very nice top-loading hay-holder. Used a plastic mat for the floor, but it seems a little slippery under his paws. Gonna see if he gets used to it in the next few weeks, otherwise we'll find something else.
 
We just finished Pip's condo!

it's made from Safeco squares (same as NIC ones) except I had to order them from the only place that sells them in the UK. Complete cost of the cage, including all the wood and other materials is probably £120 but it was well worth it!!

photo-1.jpg

Building the new set up from the top downwards (old cage in the background) We build it 3 high/ 3 long and two wide. Each grid is 14"x14"
We bought 2 packs of 200 cable ties for it, and ended up using a pack and a half, just to make sure it was secure enough.

photo-3.jpg

putting together the floor was tricky. I wanted something sturdier than plywood, so we ended up getting 2 large pine lengths, and nailing them together using "feet" on the bottom. I then cut to size and attached self-adhesive vinyl floor tiles (these are easy to clean and cheap if I ever need to replace. I bought 3 packs of 7, which was more than enough to do the entire cage) We then glued lengths of wood to the outside of the cage to make a 'border' just to keep all the hay in. I put vinyl on the inside of the border too, just to make it easier to clean.

photo-2.jpg

Top half before we put the shelves in and snipped the cable ties. If it's big enough to fit a boyfriend in, it's big enough for Pip!

photo-4.jpg

Pip 'helping'. This is the only picture of the ramp I have before it went in the cage. I used a cut off from plywood that I had used for the shelves, covered it in vinyl and then glued wood cut offs for steps. I later had to add patches of carpet because this was too slippery for him. I drilled holes through the plywood on one side to attach it to the cage with cable ties.

photo-5.jpg

Finished condo. I covered two pieces of wood in vinyl and glued them to the top level, just to stop Pip sliding off. Gives him a nice little balcony. We also added dowels under the shelves, just for a little extra support.
The door is secured by a dog lead clip, attached to the wire with cable ties, so that it doesn't move about.

photo-6.jpg

"Hey MTV, this my crib"

photo-8.jpg

Pip enjoying the top level

photo-9.jpg

How much space the condo actually takes up in my room. It's not too bad, and because I could choose how it looked (the floor tiles/ materials) I think it co-ordinates with my room quite well!
Behind the cage is my handmade run for when he's out in my room.

photo-10.jpg

The old set up with added boyfriend. Pip's out more than he's in.

photo-12.jpg

Another picture of the run in action with the old set up. Works the same with the new one. Because it's two seperate pieces, I can either have them like this in an 'L' shape, or straight across, which literally gives him half of my room to run around in :)

Both Pip & I are in love with the new bunny condo, and I have plans to add maybe another level and a lot more hidey boxes/ holes, but for now, it's about a million times better (and bigger) than what we had before!!

I think that these things should be the standard for rabbit accomodation, they really are fab!!
 
This is a hutch that my dad built me. It has two seperate compartments for the two rabbits. The top is roofing with a white "reflector" built on top to reflect the afternoon sun. There is a gutter on the front to keep rain from dripping on me! XD The floor is half wood, half plastic-covered wire. Below the hutch is an area that holds the poo that falls down, and every once in a while we rake it out and put it in the compost! Inside the hutch we have a heat lamp in each side for warmth in winter. There is a thermometer and a small fan on the front on the top.

IMG_20130711_114053.jpg

IMG_20130711_114037.jpg

IMG_20130711_115711.jpg
 
Status
Not open for further replies.

Latest posts

Back
Top